
Each year we present you with many Calxa tips and tricks that you can use to enhance your use of the app. In the bustle of the day-to-day you may have missed some of these. So, we finish the year by bringing you a summary of our best Calxa Tips. We give you the 12 Calxa Tips of Christmas.
1. Unlinked Accounts and Business Units
Sometimes, you want to create a budget for a potential project, or maybe it’s a grant you’re thinking of applying for. Simply add a new business unit in Calxa, rather than your accounting system, as well as any new accounts that relate to the potential project. Now, you can add your budgets or scenarios, and consider the feasibility of the new project.
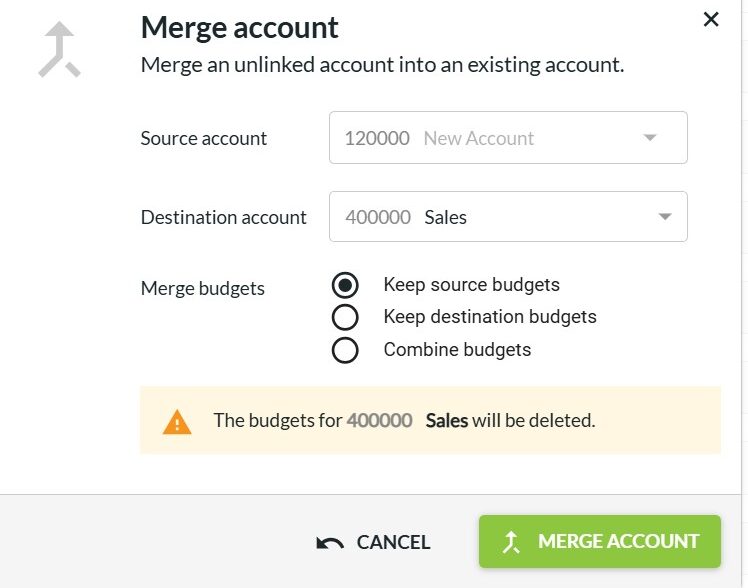
If it goes ahead, Xero, QuickBooks Online and MYOB users can then push the new business units and accounts back in to their accounting system (making this available for other systems is on our roadmap!). For all accounting systems you can merge the new account or business unit with one that you have created in the accounting system. If the project doesn’t go ahead, you can simply delete the account or business unit from Calxa and you haven’t affected anything in the accounting system.
2. Keyboard Shortcuts to Make Budgeting Easier
While it’s OK to click on a button or 2 to make some changes, sometimes you make them so frequently that slows you down. Use these keyboard shortcuts to quickly make changes as you work in budgets or scenarios:
| Shortcut | What it Does |
| F or f | Toggles full screen on or off |
| E or e | Toggles show or hide empty rows |
| I or i | Toggles show or hide inactive rows |
| = | Starts a calculation. For example, =5*12 would enter 60 in your budget |
| Ctrl Z | Undo your last action |
| Ctrl Y | Redo the last action |
| Ctrl A | Select all visible cells |
| Ctrl X | Cut the selected information |
| Ctrl V | Paste the selected values |
| Shift + Scroll | Scroll left and right rather than up and down |
3. Copy Budget Formulas to Next Year
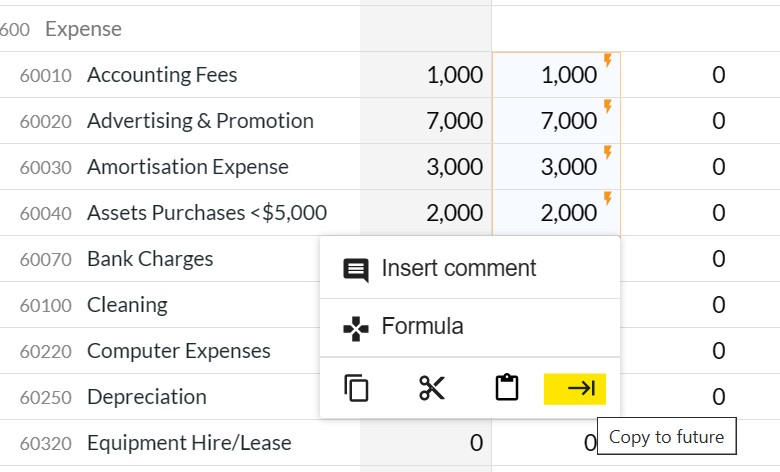
To copy formulas, you need to include one month that has the formula in it and your target date range:
- Select the cell containing the formula, or consecutive rows to do a range of them.
- Use the ellipsis menu at the bottom and then Copy to Future.
4. Actuals + Budgets in Budget Formulas
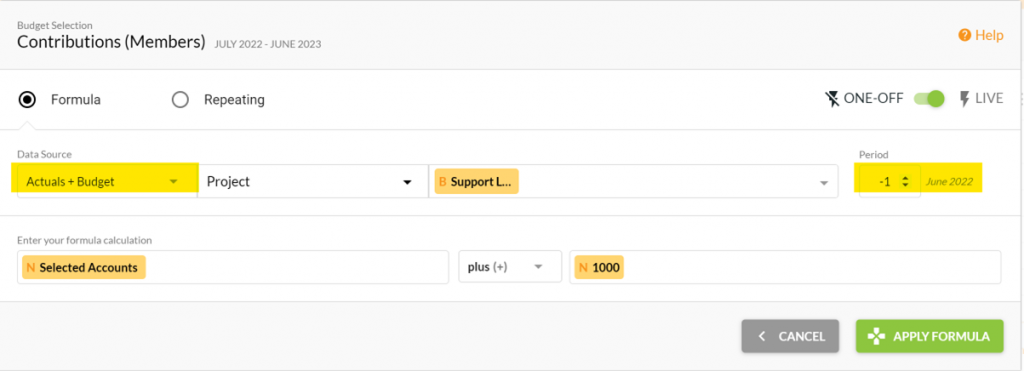
In our budget formulas, we give you the choice of choosing either Actuals or any Budget as a data source. But sometimes you want a combination. Say, for example, you want to budget for your sales as an increase of $1,000 on the previous month. But not the previous month budget. You want to start from last month’s Actuals if there were some but use the budget otherwise.
The solution is to create a budget version called Actual + Budget and use the Budget Factory to populate that each month.
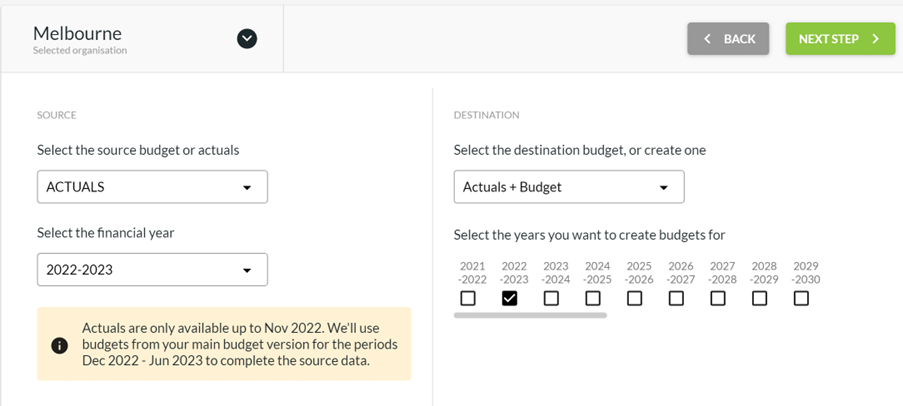
Set the source as the Actuals for the current financial year, the destination as the Actuals + Budget. This will populate it with actuals up till the end of last month, your main budget for the rest of the year. Now use this as your budget source:
5. Find the Reports you Need
With lots of report templates to choose from, there are also many ways to find them. Here’s some tips to help you get the ones you need:
- Use the search box. Type some of the words you are looking for such as Last Year Budget or % variance and we’ll show the best matches.
- Filter based on the report data type or reporting period. Financial Year reports typically include month, year to date and full year or similar. Multiple Period reports cover a range of months, quarters or years.
- Filter based on reports Used in bundles to see the ones you (or your colleagues) have included in report bundles.
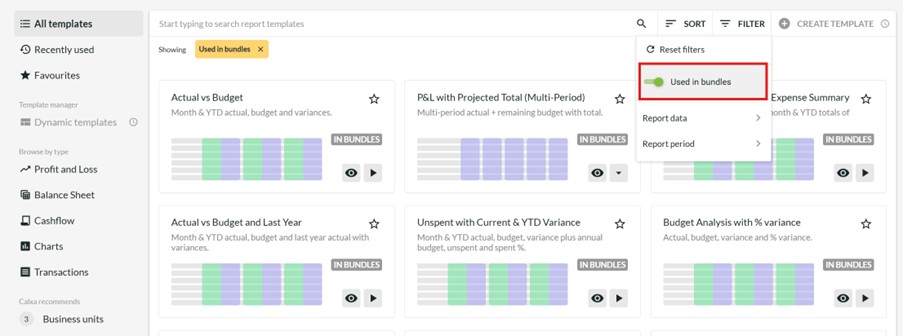
- Click the star on a template you like to add it to your favourites so you can easily find it next time.
- Choose Recently Used to repeat a previous template.
- Browse by type to select reports for Profit & Loss, Balance Sheet, Cashflow or Charts. Sort them by Recommended, Popularity or Name.
- Use the Calxa Recommends lists at the bottom left for ideas on different uses.
6. Select Dynamic Column Numbers on Multi-Period Reports
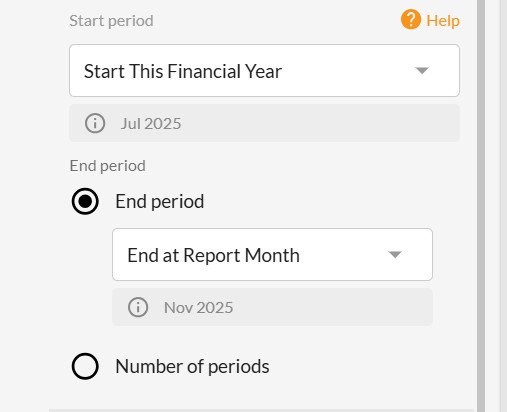
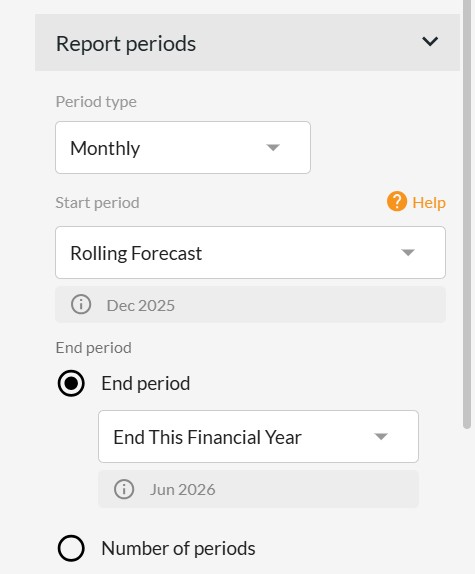
When you select one of our multi-period reports, such as the P&L with Projected Total or the Cashflow Forecast, we default to a 12-month date range as that’s what most people want. But sometimes you want something different and the report filters now give you that option.
For example, for the financial year reports, set the End period as End at Report Month to get a year-to-date report.
For a cashflow forecast that includes just the current financial year set the end period to End This Financial Year.
7. Super-Charge your Reports with Account Trees
This certainly would have to be our ‘wow’ Calxa Tip all round. Use Account Trees to manage the rows in your reports, or when Consolidating Organisations.
- Use one Account Tree across multiple entities
- Auto-allocate accounts when adding another organisation with a similar structure
- Add Calculated Rows for running totals or any sub-totals
- Insert KPI rows to add flavour to your reports
- Exclude some accounts from your reports
- Improved handling of new accounts
We came up with 7 Uses for Account Trees but there are many more!
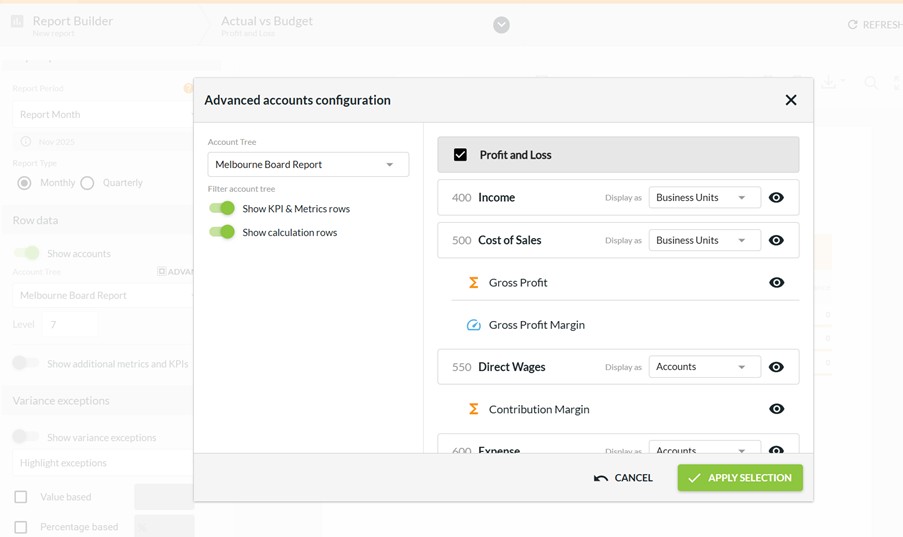
One of the enhancements we have added in the past year is the option to choose business units rather than accounts for any section of the account tree when you use it on a report. Just select the Advanced option in the report filter and you will find this easy to do.
8. Sorting Calculation Rows in an Account Tree
When you add calculated rows to an Account Tree, they are added to the end of a header section. By adding empty headers (with no accounts allocated to them), you can exert more control over the positioning of both calculated rows and KPIs.

Normally KPIs and Metrics will be sorted in the order you have defined them in the KPIs and Metrics screen but this enables you to override that order. Metrics will show before KPIs but you can change that by creating a KPI for each metric and then they will all sort in the KPI order.
9. Bulk Update Your Report Bundles
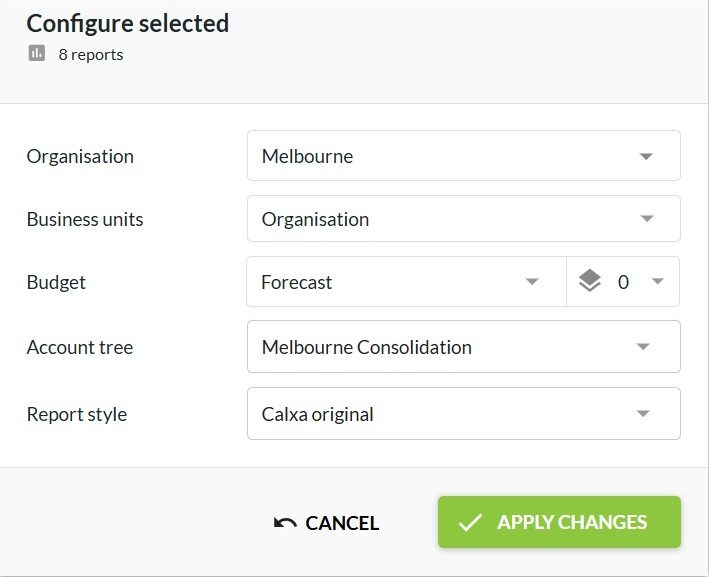
Report bundles are one of the key time-savers in Calxa but did you know you can do bulk updates to the reports in a bundle? This is especially useful when you have just made a copy of a bundle for another audience. Use the Bulk Actions button at the top right to select them all and then configure them to change the organisation, budget, style and more.
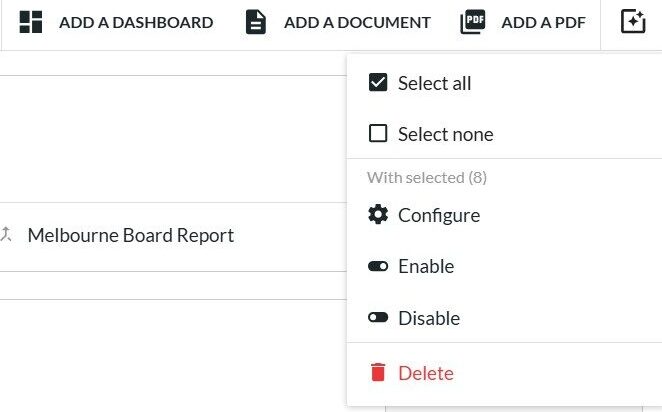
Select all to start and then de-select anything you don’t want to update (like a dashboard or cover page), then choose Configure to make your changes.
If you’re one of a team working in Calxa, create groups to manage your bundles and keep them separated. And, to deliver them easily to your audience, schedule them with a workflow. Workflows now work for flexible periods like every 2 months or every quarter.
10. Build your own Dashboard: The Quick Guide
There’s lots you can do with dashboards to present information to your users. Here’s the cheat sheet to get started:
- Add a new Data Source (under Dashboard Tools) to select the accounts or KPIs you want to include
- In the Dashboard Manager, create a new dashboard and attach your data source
- Then add tiles from templates using the builder
- Choose the template that suits you, select your data source and filter according to your needs.
- Add the next tile to your dashboard until you are done!
For more information watch the Dashboard Basics video. It’s not hard and you’ll soon get the hang of it. Then see how easy it is to share a dashboard with your team or clients.
11. Backup your Calxa Data – the Ultimate Calxa Tip
Now, for the big disaster scenarios, you can confidently rely on us to keep your data safe and secure. It won’t get lost through fire, flood or mechanical failure. But how do you protect yourself when you have a moment of carelessness? When you’re in a hurry to update your budget and realise you have just changed the wrong one?
The best practice is to export your budget to a spreadsheet whenever you’ve made major changes to it. That way you can easily import it again any time you need.
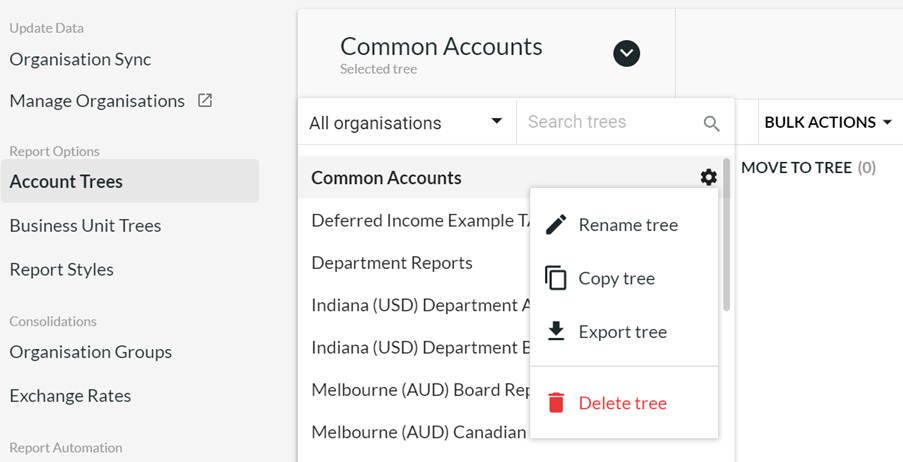
You can also export Account Trees and Business Unit Trees. Select the tree, then on the cog next to the name, choose Export Tree.
12. Handing Over Calxa Tips
Are you leaving your job and handing over to someone else?
Transfer Ownership of your subscription so they have full access.
If they are the appropriate person to maintain payments, change the billing owner as well. Then point them in the direction of our learning resources.
- Our Getting Started Webinars are a good place to start.
- The online Help Centre is stocked with both videos and help notes.
- And, of course, they can get in touch with us if they get stuck.
And don’t forget Calxa for your reporting needs in your next role!